Humidity, improper surface prep, and the wrong paint or stain can cause your cabinet finish to chip and peel. Professional refinishing techniques and quality materials will give you long-lasting results that resist future damage.
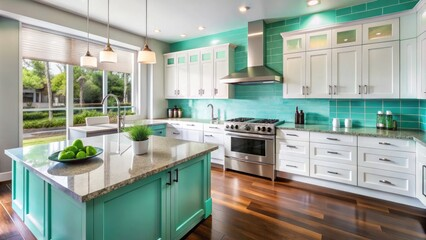
Cabinet Refinishing Sacramento preparation includes cleaning and sanding the cabinets, choosing the right primer, applying multiple thin coats, and allowing each coat to dry completely between applications. Using a topcoat also protects your cabinets from moisture, heat, and daily wear.
Sanding
When you have to constantly clean your cabinets, the finish can start to chip and peel. This not only ruins your home’s appearance but can also expose the wood to moisture that causes swelling and warping. This is why it’s important to take the time to properly prep your cabinetry. By sanding the surfaces and applying a high-quality primer, paint and topcoat, you can achieve a smooth, beautiful finish that will last for years.
While minor cleaning can keep dirt and grime from discoloring surfaces, it’s not enough to protect cabinetry from environmental factors like heat and humidity that cause finishes to peel. It’s also essential to use a clear topcoat that shields your new paint or stain from oil, steam and other contaminants.
Surface Preparation
A cabinet that’s not properly prepared is a recipe for future problems, regardless of how well you refinish it. To prevent this, you’ll need to wipe down all surfaces to remove grease and grime before sanding. Use a degreaser or a mix of warm water and dish soap to make sure the surfaces are thoroughly clean and dry. This will ensure that the sanding process is effective and will not damage or dull the new finish.
It’s also important to use a primer specifically designed for cabinetry and other high-traffic areas, which provides a strong bond between the surface and the paint or stain. Skipping this step or using a low-quality primer will weaken adhesion and cause the finish to chip and peel more quickly. Applying multiple thin coats and allowing the resulting layers to fully dry in between will also ensure that your new finish lasts longer.
Filling Holes and Cracks
As with any cabinet painting project, proper preparation is key to a high-quality finish that looks great and lasts. Start by thoroughly cleaning the cabinets with a degreaser. Kitchen cabinets in particular have likely been splattered with cooking oil over the years, which can be difficult to remove. Then sand the cabinets lightly to smooth out the surface and roughen it, to ensure that the new coat will adhere well.
A quality topcoat is also important for a durable finish. There are a few different options available, including polyurethane and polycrylic. It is essential to select a product that has been formulated for wood surfaces, as these products will be more resistant to moisture and heat damage. It is also a good idea to choose a low-VOC product, which emits fewer harmful fumes during application and drying.
Once the topcoat has dried, you can reassemble your cabinets. Be sure to carefully align the doors and drawers so they open and close properly, and apply a thin coat of lubricant to the hinges and slides to prevent them from sticking.
Repainting, restaining, and refinishing are all effective cabinet renovation techniques. They work well on a variety of materials, from laminate to solid wood. However, they each require special skills and attention to detail to achieve a flawless finish. If you’re not careful, a poorly executed finish may result in hairline cracking or premature peeling. These problems are often caused by using low-quality paint or stain, which may not bond well with the wood, or by applying thick coats that dry unevenly. Choosing a high-quality product, preparing the surface correctly, and using patience can help you avoid these common issues.
Primer
Cabinets take the brunt of daily kitchen abuse: smudges, spills, and even a stray elbow bump. To keep them looking gorgeous through frantic morning rushes, sloppy snack raids, and the passage of time, they call for finishes that stand up to cleaning products, moisture, and heat. Durable finishes require expert preparation, quality materials, and precise application technique. To prevent peeling, it’s essential to clean the cabinets thoroughly and lightly sand them before priming and painting.
Before applying paint, it’s important to use a bonding primer that’s specifically designed for cabinetry. These primers seal the wood or substrate, block stains, and create a smooth base for paint layers. Skipping this step or using a low-quality primer can lead to chips and peeling over time.
Once the surface is primed, it’s ready for a coat of high-quality, cabinet-grade paint. Paints made for cabinetry aren’t your run-of-the-mill wall paints; they’re formulated to withstand everyday wear and tear, including chemical resistance to cleaners and moisture resistance to avoid fading and water damage.
When it comes to application, it’s crucial to apply thin coats and allow each layer to dry completely before applying the next. This method helps ensure a thick, smooth finish that resists chipping and peeling over time.
It’s also essential to choose the right topcoat to protect your new finish. Polyurethane or polycrylic are good choices, as they offer a durable, moisture-resistant coating. The environment in which you refinish your cabinets can also impact how well the finish dries and adheres. Avoid refinishing cabinets in dusty or humid environments, as these conditions can slow the drying process and cause the finish to bubble and crack. Follow these simple tips and you’ll be able to enjoy your newly refinished cabinets for years to come.
Paint
When a fresh coat of paint fails to hold up to normal wear and tear, it can be incredibly frustrating. Whether the result of DIY work or a professional touch-up, peeling cabinets are more than just unsightly—they can shorten the lifespan of your kitchen and bathroom cabinetry and lead to costly repairs in the future.
One of the most common reasons for peeling painted cabinets is improper surface prep. Without thoroughly cleaning and sanding, grease, grime, and old finish may remain on the cabinet surfaces, weakening adhesion and causing the new paint to lift. Skipping primer is another big mistake, as it weakens the bond between the cabinet and the new coating. Rushing the process, applying thick coats, and not allowing enough time for drying can also lead to poor results.
The wrong type of paint is another major factor that can lead to peeling. Regular latex wall paint is not formulated to endure the demands of high-traffic areas, so using it on cabinets can quickly degrade the finish and leave behind a messy, uneven appearance. Choosing a premium kitchen cabinet paint designed for durability and resistance, like a waterborne alkyd enamel, is a much better choice.
Getting the most out of your new paint job requires patience and attention to detail. Skipping steps, rushing the curing process, and ignoring environmental factors like humidity can all lead to premature peeling and a lackluster appearance. The best way to avoid these mistakes is to hire a trusted professional who can ensure proper prep and adherence of the new coat of paint. Achieving a flawless, durable finish with expert craftsmanship will save you money and headaches in the long run.
Topcoat
A clear topcoat seals your cabinets to protect them from the elements. Humidity, heat exposure and daily wear cause cabinet paint to chip, so this step is vital for preserving your investment. It also helps ensure that your refinished cabinets stay stain-resistant, durable and water-resistant. The finish should be sanded and prepped again before applying the topcoat, so it adheres well to the surface. It’s also crucial that you choose a product that is formulated for your chosen type of finish (latex or oil), as different products require different sanding and prep techniques.
The main causes of chipping and peeling in painted kitchen cabinets are improper surface preparation, low-quality materials and environmental factors like humidity and heat exposure. Careful surface cleaning, deep sanding and using high-quality primer and paint will help your new finish last longer. Applying thin coats and allowing each to dry completely between applications will also strengthen your finish.
Even if you follow these tips, minor damage like chips or peeling can still happen. Investing in professional refinishing can save you time, money and future headaches. Professionals use a process that removes the old coating, sands and prepares the surface for fresh paint, and uses a spray application to create an even, factory-grade finish. They can also match colors for seamless touch-ups and provide a protective seal that resists future deterioration.
A professional finish also lasts longer than DIY touch-ups because they use high-quality products, specialized tools and a thorough prep process that includes sanding and priming. They can also prevent future problems by addressing the root causes, such as poor surface adhesion and aging adhesives. They can even install soft-close hinges to reduce the impact of heavy doors on the cabinets’ finish.
Visit our Professional Services Blogs
Smart Choice Plumbing And Air, Sanitize My Airducts, Bethesda Locksmith, Golden Coast Cleaners, Advanced Concrete Staining, Home Pool Cleaners, Brayhines Septic, Shaka Pool And Spa Cleaning,Mr Clean And Shine, Best Appliance Repair Long Beach, Gulf to Bay Water Remediation, Garage Door San Francisco, Richmond Flooring, Fence Builders Woodlands, Colorado Springs Auto, Fuel Frontlines, Expert 24 Option, Sacramento Roseville Real Estate, SLO Homes, Philadelphia Towing, State Powerwashing, Truck Tires Worldwide, Website Translation, Construction Company Farmington NM, Green Home Los Angeles, Trinity SEO Marketing, Electric Fireplaces, Argos Bookkeeping, Christopherson Drywall,Garage Door Installation, Missouri Personal Injury Lawyer Blog, Alvins Auto Body, Carpet Care Pros, Las Vegas Concrete, Clark Concrete Company, Deck Builders Missour City, Lechleitner Builders, Medical Health Insurance Policy, Royal Siding Windows, Carpet Steam Cleaners Review, Go Greeen Lawn Painting, Oakwood Skate Deck, Texas Home Remodeling And Painting, USA Home Repair Remodeling, Dream Home Remodeling Services, Brent Lawn Homes, Great Ernm Homes, Accelerated Orthodontic, Arctic Cooling And Heating, Baltimore Heating And Airconditioning